
 how-to
Energy-Efficient Home Additions: A 2026 Guide
Table of Contents
- Why Energy Efficiency Matters in Home Additions
- Plan Your Addition for Climate-Aware Design
- Home Addition Insulation: Choosing the Right Materials
- Energy-Efficient Windows for Home Additions
- Air Sealing for Home Additions
- Home Addition Heating and Cooling Options
- Permits, Building Code Compliance, and Project Timeline
- Common Mistakes to Avoid
- Frequently Asked Questions
Last Updated: October 17, 2026
Why Energy Efficiency Matters in Home Additions
Adding square footage also adds heating and cooling costs. Energy-efficient home additions protect you from that burden.
Energy-efficient design flips this: better insulation, sealed air leaks, and high-performance windows keep the addition comfortable without overworking your HVAC system, and savings compound over 20 years.
Beyond cost, there's comfort: poorly insulated rooms feel cold in winter and hot in summer, while energy-efficient additions hold consistent temperatures year-round.
Plan Your Addition for Climate-Aware Design
The design phase determines 80% of your addition's energy performance, orientation, window placement, insulation type, and HVAC integration all get decided here.
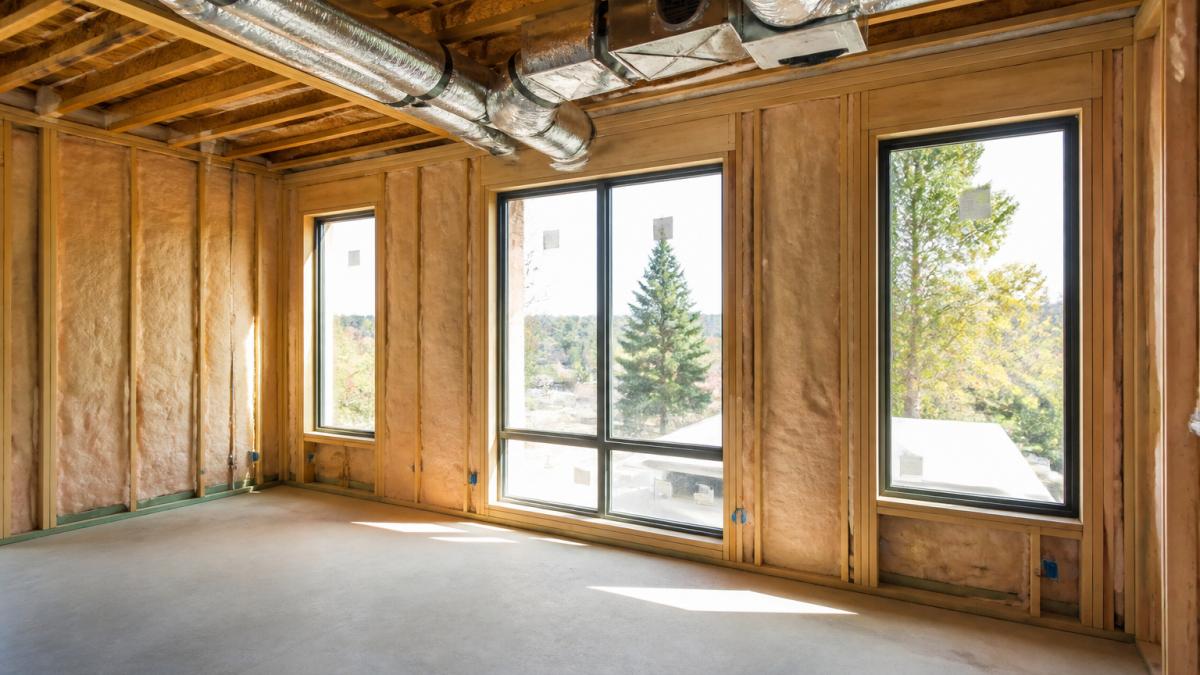
Start with your climate.
Orient the addition strategically with your contractor and architect.
A sealed, insulated thermal break between old and new prevents heat transfer through shared walls, this matters more than most homeowners realize.
Home Addition Insulation: Choosing the Right Materials
Insulation is the foundation of any energy-efficient home addition; the material affects performance, cost, and installation complexity.
Fiberglass batts are the most common choice, affordable and straightforward, at R-3.2 to R-3.8 per inch.
Spray foam offers superior air sealing, expanding to fill gaps batts miss.
Mineral wool batts outperform fiberglass at the same R-value: they resist settling, hold performance longer, and offer better fire resistance.
Here's what most contractors skip: air sealing before insulation.
Energy-Efficient Windows for Home Additions
Windows are the most visible part of an addition's thermal envelope, and the weakest link if you choose poorly.
Look for low U-values (less heat escapes in winter) and low Solar Heat Gain Coefficients (less solar heat enters in summer).
Triple-pane windows outperform double-pane by adding another insulating air gap.
Frames matter as much as glass. Vinyl and fiberglass insulate better than aluminum; avoid aluminum unless it has a thermal break.
Installation quality determines real-world performance.
Air Sealing for Home Additions
Air leakage destroys energy efficiency. A single small gap around an electrical outlet can waste as much energy as leaving a window open.
The biggest culprits are:
- Rim joists where the addition meets the foundation
- Penetrations for electrical wiring and plumbing
- Connections between walls and ceilings
- Gaps around door frames and window frames
Seal these areas before drywall goes up, expanding foam for large gaps, caulk for small cracks.
A blower door test reveals how tight your addition actually is: the contractor depressurizes the space and measures air leakage, pinpointing where air escapes.
Home Addition Heating and Cooling Options
Your addition needs a heating and cooling strategy that either integrates cleanly with your existing system or stands alone. The wrong choice shows up as hot rooms, short-cycling equipment, and climbing bills; the right choice starts with numbers, not guesses.
Start with a load calculation, not a rule of thumb
Every HVAC decision should begin with an ACCA Manual J load calculation for the addition plus a whole-house re-check.
Ask for the Manual J report. If your contractor sizes by "about a ton per 500 square feet" or by matching the old unit, get a second opinion, a proper report also shows whether your existing system has spare capacity or is maxed out.
Option 1: Extend the existing system
Extending your furnace or heat pump is the most common approach, but only when three conditions are met:
- Capacity headroom. The existing equipment must have enough spare capacity after the Manual J re-check. If the current system already runs near full load on design days, adding square footage will shorten its life and raise bills.
- Duct capacity and static pressure. New ducts must be sized for the added airflow. Adding a branch to an already undersized trunk raises static pressure, reduces airflow to the original rooms, and can void equipment warranties. A contractor should measure static pressure before and after.
- Access and routing. Running ducts through finished space, attics, or crawlspaces may require soffits, chases, or dropped ceilings. Each of those has a cost and a thermal penalty if the ducts run through unconditioned space.
If ducts must cross unconditioned space, insist on sealed, insulated ductwork (R-8 is common for supply ducts in attics) and mastic-sealed joints rather than duct tape, leaky attic ducts can lose a meaningful share of the air you paid to cool.
Option 2: Ductless mini-split heat pump
A ductless mini-split serves the addition independently and is often the cleanest choice for additions far from the existing air handler or for homes with boiler/radiant heat and no ductwork. Modern cold-climate heat pumps maintain capacity at low outdoor temperatures, and inverter-driven compressors modulate output instead of cycling on and off.
Key design details that separate a good install from a bad one:
- Line-set length and elevation. Refrigerant line sets have maximum length and vertical-rise limits in the manufacturer's installation manual. Exceeding them reduces capacity and can void the warranty.
- Indoor head placement. Mount the indoor unit high on an interior wall where supply air can throw across the room, not directly at a seating area. Avoid placing it above a heat source or in a tight alcove.
- Low-ambient performance. Confirm the model's rated heating capacity at your local winter design temperature, not just its nominal tonnage.
- Drainage. Condensate must drain by gravity or a condensate pump. A poorly sloped drain line is a common callback.
Option 3: Hybrid and zone-based approaches
For larger additions or homes with uneven temperatures, a zoned approach often beats a single new system. Options include:
- Zoning the existing system with motorized dampers and separate thermostats, provided the duct system can handle the added zones.
- A dedicated heat pump water heater or point-of-use unit if the addition adds a bathroom far from the existing water heater.
- Supplemental spot ventilation (see below) so the HVAC system isn't asked to manage moisture the addition generates.
Ventilation and moisture control
Tighter additions need deliberate ventilation. ASHRAE 62.2 provides the standard residential ventilation rate, and many energy codes reference it. In a hot-dry climate, an energy-recovery ventilator (ERV) or heat-recovery ventilator (HRV) can bring in fresh air while limiting energy loss, and an ERV also helps manage humidity. Bath fans in new bathrooms should be sized to the room and vented to the outdoors, never into an attic.
Commissioning: the step most homeowners skip
After installation, the system should be commissioned, not just turned on. A proper startup includes:
- Verifying refrigerant charge by subcooling or superheat, not by "feels cold."
- Measuring airflow at each register and confirming total system airflow against the design.
- Checking static pressure and temperature rise (furnace) or temperature split (heat pump).
- Confirming thermostat programming, zoning operation, and condensate drainage.
Ask for the commissioning report. It is your baseline for warranty claims and future service, and it is the difference between a system that performs as designed and one that merely runs.
Permits, Building Code Compliance, and Project Timeline
Energy codes are enforced, not advisory. Your addition must meet the adopted energy code before the building department issues a certificate of occupancy, and the inspection sequence is predictable once you know what to expect.
Which codes actually apply
Most jurisdictions in the United States adopt the International Residential Code (IRC) for one- and two-family dwellings and the International Energy Conservation Code (IECC) for energy provisions, often with state or local amendments.
Two compliance paths are common under the IECC:
- Prescriptive path. Meet the table values for envelope, fenestration U-factor and SHGC, and duct insulation. This is the simpler path for most additions and is what inspectors check most often.
- Performance path. Demonstrate whole-building energy performance using approved software compared against a reference design. This can allow trade-offs (for example, better windows in exchange for a different wall assembly) but requires modeling and documentation.
Ask your designer or contractor which path they are using and get it in writing. A prescriptive path is usually faster to permit; a performance path can be worth it when the addition's geometry makes the prescriptive tables hard to meet.
What the permit application typically includes
A complete submittal reduces review time. Expect to provide:
- Site plan showing the addition's footprint, setbacks, and drainage.
- Floor plans and elevations with room dimensions and window/door schedules.
- Structural plans stamped by a licensed design professional where required (common for second-story additions, large openings, and engineered beams).
- Energy compliance documentation, either the prescriptive compliance forms or the performance-path report.
Incomplete submittals are the most common cause of review delays. A pre-submittal meeting with the building department, when offered, is worth the time.
Inspection sequence
Inspections generally follow construction sequence, and each one gates the next:
- Foundation and footing inspection before concrete placement.
- Framing and sheathing inspection before insulation and drywall, including structural connections and shear nailing.
- Rough-in inspections for electrical, plumbing, and mechanical before cover.
- Insulation and air-sealing inspection before drywall, this is where the energy code is most visibly enforced.
- Drywall and final inspections, including final electrical, plumbing, mechanical, and building.
- Certificate of occupancy issued after all finals pass.
Some jurisdictions also require a duct leakage test or a blower door test as part of energy-code compliance. Confirm the requirement early so the test is scheduled before drywall, when fixes are inexpensive.
Timeline expectations
Plan for the permit review to take weeks, not days. A common range is two to six weeks for a straightforward addition, longer for second-story additions or projects in jurisdictions with heavy review queues or design-review requirements. Construction itself depends on scope, weather, and inspection scheduling; framing, rough-ins, and finals each add calendar time. Build the inspection schedule into the contract so no one is waiting on a callback.
Why compliance protects you
A permitted, inspected addition is documented. That matters at resale, for insurance, and for future remodeling. Unpermitted work can be discovered during a sale inspection and may require retroactive permits, opened walls, and corrections at the seller's expense. Energy-code compliance also protects your operating costs: the envelope and duct requirements in the code exist because they pay back over the life of the home.
Your contractor should own permit coordination end to end, submittal, inspection scheduling, and correction of any deficiencies. When your contractor manages that process, you avoid the back-and-forth between inspectors, subs, and your own schedule.
Common Mistakes to Avoid
The most common mistake is underestimating insulation.
Another mistake is poor air sealing. Contractors sometimes focus on insulation while ignoring air leaks.
Window selection mistakes happen when homeowners prioritize appearance over performance.
Forgetting about thermal bridging is another costly error.
Finally, many homeowners skip the blower door test.
Adding square footage to your home is a major investment.
Frequently Asked Questions
How can I make a home addition more energy efficient?
Focus on four core areas: insulation (walls, attic, basement rim), air sealing around windows and doors, high-performance windows, and a properly sized HVAC system connected to your existing heating and cooling. Start with your climate zone and design the addition to minimize heat gain in summer and heat loss in winter. Work with your contractor to ensure the addition integrates seamlessly with your home's existing envelope so conditioned air doesn't escape through gaps or thermal bridges.
What insulation is best for a home addition?
Fiberglass batts, mineral wool, and spray foam all work well, depending on your budget and climate. Spray foam (open-cell or closed-cell) offers superior air sealing and R-value per inch, making it ideal for tight spaces and extreme climates. Mineral wool resists moisture and fire better than fiberglass. Batts are economical but require careful installation to avoid gaps.
Should a home addition have its own heating and cooling system?
Most additions work best as an extension of your existing HVAC system, with new ducts and zones added to your current furnace or heat pump. A separate system is rarely necessary and costs more to install and maintain. However, if your existing system is undersized or your addition is far from the main unit, your contractor may recommend a supplemental mini-split heat pump for that zone. Proper ductwork design and balancing ensure comfort throughout the addition.
How do I prevent drafts and air leaks in a new addition?
Air sealing happens in layers: seal the rim joist and foundation, caulk all window and door frames before installation, use gaskets behind electrical outlets and switches, and seal penetrations for plumbing and electrical. After framing, spray foam or caulk all gaps where walls meet the roof or existing structure. Before drywall, pressure-test the addition to find leaks. Your contractor should follow the building code air-sealing checklist to minimize energy waste and drafts.