 how-to
How to Prepare Your Site for New Home Construction
Table of Contents
- What Site Preparation Involves
- Step 1: Survey Property Lines and Obtain a Geotechnical Report
- Step 2: Conduct Soil Testing for New Home Foundation
- Step 3: Clear Vegetation and Prepare the Site
- Step 4: Plan Construction Site Utility Hookups
- Step 5: Obtain Permits and Meet Regulatory Requirements
- Residential Site Preparation Cost Breakdown
- DIY vs. Professional Site Preparation
- Frequently Asked Questions
Last Updated: October 3, 2026
What Site Preparation Involves
Site preparation is the foundation of any successful construction project. Learning how to prepare your site for new home construction starts before you break ground, the land must be surveyed, tested, cleared, and engineered to support the structure you're building. This isn't optional work, it's the difference between a home that lasts decades and one that settles, cracks, or develops foundation problems within years.
Teams that invest in proper site preparation upfront spend far less fixing problems later; cutting corners creates expensive headaches down the road.
Understanding how to prepare your site for new home construction means addressing property surveying, soil testing, vegetation clearing, grading and excavation, utility planning, and securing the necessary permits. Each step builds on the previous one. Skip one, and the steps that follow become harder and more costly.
Step 1: Survey Property Lines and Obtain a Geotechnical Report
Your first task is to hire a licensed surveyor to establish your exact property lines and identify any easements or setbacks that affect where you can build. This survey becomes the reference point for everything that follows.
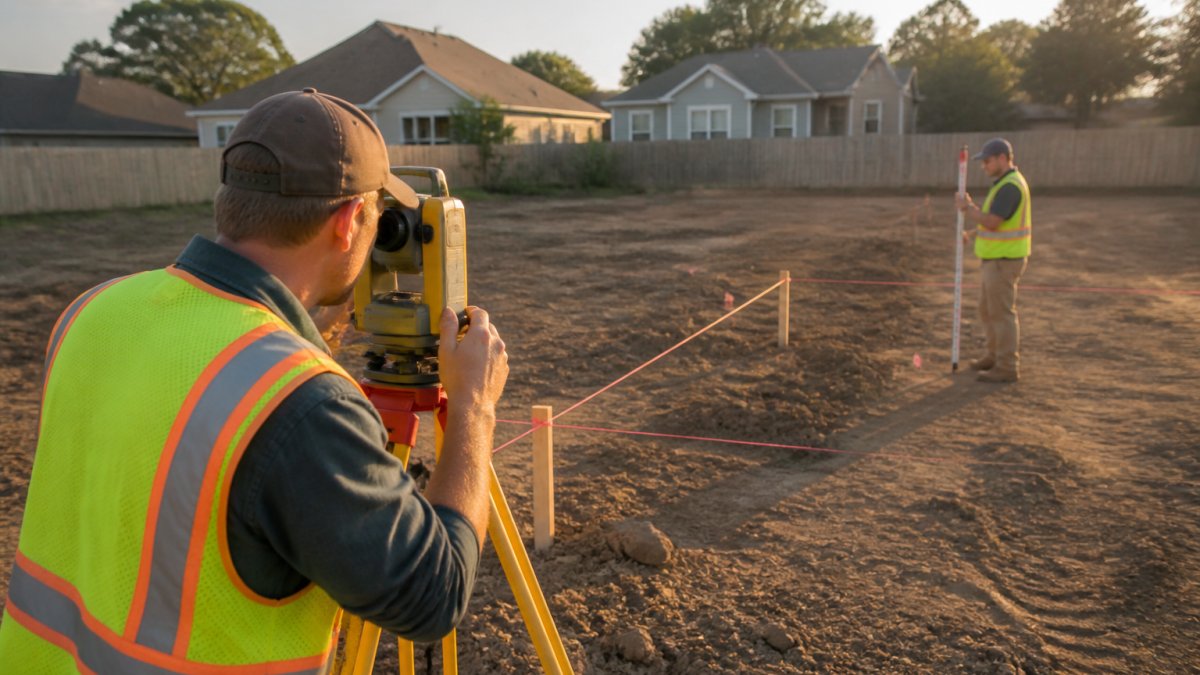
A geotechnical engineer bores test holes, extracts soil samples, and analyzes composition, compaction, water table depth, and load-bearing capacity, data that determines foundation depth and type.
The survey costs depend on lot size and complexity. The geotechnical report typically costs more, but it's essential. Skipping this step means guessing about your foundation, and guessing wrong costs tens of thousands in repairs or reconstruction.
Hire a surveyor and geotechnical engineer licensed in your state. Ask your local building department for referrals.
Step 2: Conduct Soil Testing for New Home Foundation
Soil testing determines bearing capacity, how much weight the soil can safely support per square foot, which directly determines your foundation type and depth.
Common soil types, clay, silt, sand, and rock, behave differently under load and in wet conditions. Clay shrinks when dry and swells when wet, causing foundation movement. Rock provides excellent support but costs more to excavate.
The geotechnical engineer recommends foundation design based on soil conditions, deeper foundations or special reinforcement for poor soil, shallower for good soil.
A few key soil metrics to understand:
- Bearing capacity, How many pounds per square foot the soil can support safely
- Compaction, How densely packed the soil is; loose soil needs to be compacted before building
- Water table, How deep underground water sits; high water tables complicate foundation work
- Frost line, How deep soil freezes in winter; your foundation must extend below this line
Your geotechnical report will specify all of these. Share this report with your architect and contractor. It shapes every decision about your foundation and site grading.
Step 3: Clear Vegetation and Prepare the Site
Once you have your survey and soil report, site clearing and grubbing begins: removing trees, brush, stumps, and topsoil from the building footprint and access areas.
Clearing and grubbing removes obstacles for equipment access, exposes working soil, and prevents vegetation decomposition under your foundation, which creates voids and settling.
Bulldozers, excavators, and graders do this work. Erosion and sediment control measures must be in place before clearing begins; exposed soil erodes easily and sediment can pollute storm drains and violate environmental regulations.
Common erosion control methods include silt fences, erosion control blankets, and sediment basins. Your site plan and local regulations will specify what's required.
After clearing, grading establishes proper drainage patterns so water flows away from your building. Poor grading causes pooling, basement moisture, and structural problems.
Step 4: Plan Construction Site Utility Hookups
Before excavation, identify existing utilities and plan new connections for water, sewer, electric, gas, and communications.
Call your local utility locating service ("Call Before You Dig") at least 2-3 days before any digging. Hitting a buried line causes serious injury, environmental damage, and expensive repairs.
Plan utility connections with your engineer and contractor. Water and sewer lines need proper slope and depth; electric and gas have specific burial requirements. Septic systems require tank location and drain field design based on soil test results.
Plan temporary power and water for the construction crew, ensuring the temporary service panel and supply don't interfere with the building footprint.
Step 5: Obtain Permits and Meet Regulatory Requirements
Before any dirt moves, obtain building permits. Your local building department reviews your site plan, foundation design, and building plans for compliance with zoning ordinances, setback requirements, and building codes.
Most jurisdictions require: building permit, grading permit, erosion control permit, utility permits, and septic permit (if applicable).
The permit process typically takes 4-6 weeks. Your architect or contractor usually handles applications; you're responsible for approvals and fees.
Zoning ordinances specify setback distances, lot coverage limits, and height restrictions. Your survey and site plan must demonstrate compliance.
Building codes establish minimum standards for structure, safety, and energy efficiency. Your foundation design, grading plan, and utility layout must meet code and pass inspection.
Residential Site Preparation Cost Breakdown
Site preparation costs vary by lot size, soil conditions, regional labor, and complexity. Understanding realistic cost ranges helps you budget accurately.
Survey and Geotechnical Report A property survey costs $300-$1,200 depending on lot size and complexity.
Clearing, Grubbing, and Demolition Removing trees, brush, and stumps costs $1,000-$5,000 on a typical quarter-acre lot; heavily wooded sites exceed $10,000.
Erosion Control and Stormwater Management Basic erosion control costs $500-$2,000. Environmentally sensitive sites may require enhanced controls, adding $3,000-$10,000.
Utility Planning and Connections Utility locating is usually free or low-cost. Extending water and sewer lines costs $2,000-$8,000. Septic systems cost $3,000-$8,000.
Permits and Engineering Permit fees typically range $300-$2,000. Engineering and plan preparation cost $1,000-$3,000 depending on complexity.
Total Site Preparation Budget Straightforward, flat lots with good soil: $8,000-$18,000. Moderate sites with some challenges: $18,000-$35,000. Difficult sites: $40,000-$60,000+.
Labor costs in urban and high-cost-of-living areas run 30-50% higher than rural regions.
DIY vs. Professional Site Preparation
Site preparation involves tasks with different skill and licensing requirements. Understanding which work requires professionals prevents costly mistakes and violations.
Tasks Homeowners Can Handle
Homeowners can handle: manual vegetation removal (with proper safety gear), stump grinding (rent for $75-$150/day), topsoil removal supervision, and site cleanup.
The key: these tasks don't require professional licensing, don't involve buried utilities, and don't affect structural safety or code compliance.
Tasks Requiring Licensed Professionals
Other site prep work must be handled by licensed or certified professionals:
- Property surveying: Only a licensed surveyor can legally establish property lines and identify easements. This is a legal requirement in most states. Costs $300-$1,200. Attempting to survey yourself creates boundary disputes and permit rejections.
- Geotechnical engineering: A professional geotechnical engineer must conduct soil testing, bore holes, and recommend foundation design. This requires a Professional Engineer (PE) license in most states. Skipping this or using unqualified advice leads to foundation failure. Costs $800-$3,000.
- Heavy equipment operation: Bulldozers, excavators, and graders require skilled, experienced operators. Operating heavy equipment without training damages property, causes injuries, and creates liability. Hire licensed heavy equipment contractors.
- Utility locating and coordination: Before any digging, call your local utility locating service ("Call Before You Dig"). Hitting a buried line causes serious injury, environmental damage, and legal liability. This service is free or low-cost and is required by law.
- Permit applications and inspections: Building departments require accurate, complete permit applications. Errors cause rejections and delays. Your architect or contractor typically handles this, but the work must meet code and pass inspection.
- Erosion control design and installation: If your site requires erosion control measures (silt fences, sediment basins, erosion blankets), these must be installed per your site plan and local environmental regulations. Improper installation violates stormwater regulations and can result in fines.
- Grading and drainage design: While you can supervise grading work, the design must be engineered and approved. Poor grading causes water to pool around your foundation, leading to basement moisture and structural damage. This is too critical to guess on.
The Real Cost of DIY Mistakes
Attempting to skip professional steps introduces serious risks:
- Utility strikes: Hitting a buried electric, gas, or water line can cause electrocution, gas leaks, water main breaks, and environmental contamination. Liability can exceed $100,000. This alone makes "Call Before You Dig" non-negotiable.
- Permit rejection: Inaccurate or incomplete permit applications get rejected, delaying your project by weeks or months. Resubmitting costs time and money.
- Foundation problems: Poor soil preparation, inadequate compaction, or incorrect grading causes foundation settling, cracking, and structural failure. Fixing foundation problems after the home is built costs $20,000-$100,000 or more.
- Environmental violations: Improper erosion control or stormwater management violates EPA and state regulations. Fines can reach $10,000-$50,000 per day of violation.
- Code violations: Grading or utility work that doesn't meet code fails inspection, requiring expensive rework.
The Professional Approach
Hiring professionals for surveying, engineering, permitting, and heavy equipment work costs more upfront but protects your investment. Professionals carry liability insurance, understand local codes, and have the equipment and expertise to do the work correctly. The cost of professional site preparation is far less than the cost of fixing a single major mistake.
A practical middle ground: handle manual cleanup and vegetation removal yourself if you're comfortable with the physical work and safety requirements. Hire professionals for surveying, engineering, heavy equipment operation, utility coordination, and permitting. This approach saves money where it's safe to do so while protecting the critical work that determines your home's structural integrity and your project's timeline.
Frequently Asked Questions
What is the first thing you should do before beginning site preparation for new home construction?
Start with a professional property survey to establish exact property lines, setbacks, and boundaries. This prevents disputes with neighbors and ensures your home complies with zoning ordinances. Next, order a geotechnical report that includes soil testing and subsurface investigation. These two steps determine where you can legally build and what foundation type your soil can support. Without them, you risk costly delays or design changes later.
How much does residential site preparation cost breakdown typically include?
Site preparation costs vary based on lot size, soil conditions, topography, and local labor rates. Typical expenses include surveying, soil testing and geotechnical analysis, clearing and grubbing, grading and excavation, utility connection fees (varies by municipality), and permitting. Erosion control and stormwater management add additional costs depending on site conditions. For a detailed breakdown specific to your project, contact a local general contractor for a site assessment and quote.
What permits are required for residential site clearing and preparation?
Most jurisdictions require a building permit before site work begins. You'll also need permits for erosion and sediment control, stormwater management, and utility connections. Some areas require environmental permits if the site is near wetlands or protected habitats. Local zoning ordinances may impose setback requirements and restrict clearing in certain areas. Check with your county or city building department early in the process, permitting delays are a common cause of project setbacks.
How long does site preparation typically take for a new home?
Site preparation usually takes 2-6 weeks, depending on lot size, soil conditions, and weather. Simple, flat sites with good drainage may finish in 2-3 weeks. Complex sites with poor soil, significant topography changes, or extensive erosion control needs can take 6-8 weeks or longer. Regional climate affects timing: heavy rain can delay grading and compaction, while frozen ground in winter slows excavation. Your general contractor can provide a more accurate timeline after surveying and soil testing.