
 how-to
Construction Site Organization for Homeowners: 2026 Guide
Table of Contents
- Step 1: Scope the Project and Set Your Site Layout
- Step 2: Build a Residential Construction Site Safety Checklist
- Step 3: Managing Construction Debris Removal Without the Mess
- Step 4: Homeowner Communication With General Contractors
- Step 5: Tool Storage, Inventory Tracking, and Site Security
- Step 6: Neighbor Relations, Noise, and Permit Requirements
- Step 7: Post-Construction Site Restoration and Final Walkthrough
- Conclusion: When to Bring in a General Contractor
- Frequently Asked Questions
Last Updated: September 16, 2026
Step 1: Scope the Project and Set Your Site Layout
Construction site organization for homeowners starts long before the first dumpster arrives. It begins with a plan that assigns every square foot of your property a job: staging, storage, or access. Master Builder llc. has managed enough residential projects to know that a disorganized site costs homeowners time, money, and patience.
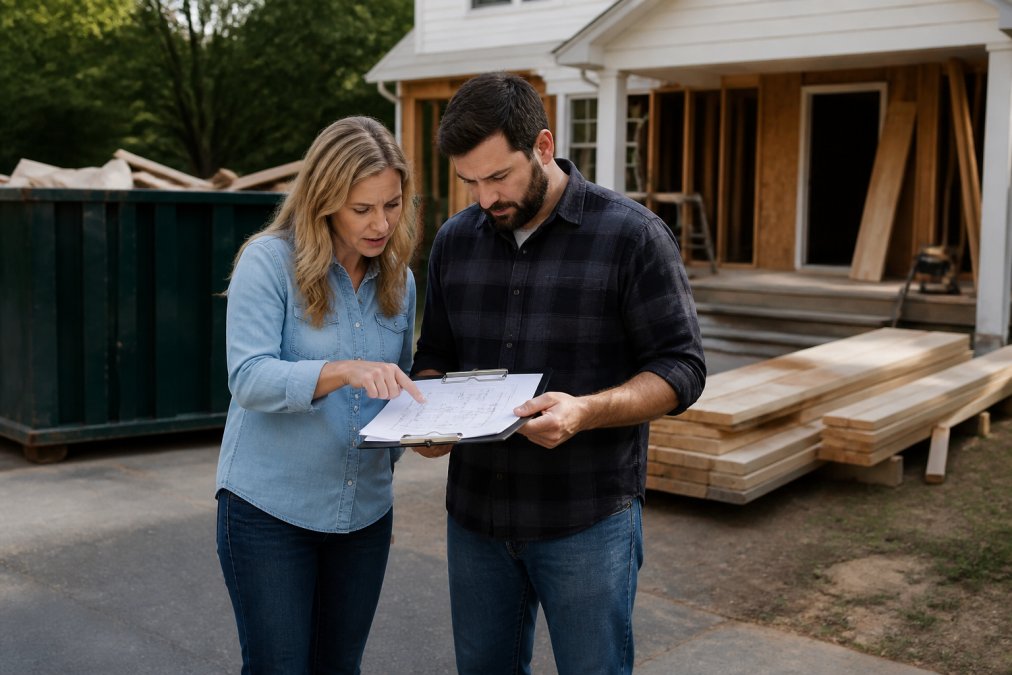
- Staging area: Where materials land and stay until installation. Keep it within 15 metres of the work zone to cut carry time.
- Storage: Lockable space for tools and high-value materials, ideally inside the structure once framing is up.
- Access route: One clear path for deliveries and crews, wide enough for a pickup and trailer.
Zoning Your Property: Staging, Storage, and Access
Treat your property like a small construction logistics yard. Materials arrive in waves, and each wave needs a defined home. Lumber, drywall, and fixtures should never block the path crews use to move between tasks.
Step 2: Build a Residential Construction Site Safety Checklist
A residential construction site safety checklist protects the people living in the home, the crews working on it, and anyone who wanders onto the property. On occupied sites, safety planning is not optional.
Your checklist should cover:
- Secured perimeter fencing with a locked gate
- Clearly marked emergency exits kept clear at all times
- Tools and power cords stored when not in use
- Hazardous materials locked in a designated cabinet
- Daily debris sweep of walkways and stairs
- Fire extinguisher accessible near hot work
Protecting Kids, Pets, and Daily Living Spaces
If you are living in the home during construction, contain the work zone. Plastic sheeting and zip walls keep dust out of living areas. A locked gate keeps kids and pets away from open trenches, tools, and debris.
Step 3: Managing Construction Debris Removal Without the Mess
Managing construction debris removal comes down to three habits: separate waste streams, schedule pickups on a fixed rhythm, and never let debris pile up. A remodel can generate several dumpster loads, so plan capacity before you need it.
Sort materials into categories as work progresses:
- Clean wood: Can often be recycled or reused
- Drywall and masonry: Heavy, needs its own container
- Metals: Scrap value, keep separate
- General trash: Everything else
Sizing Your Dumpster and Avoiding Overweight Fees
The most common homeowner mistake is ordering a dumpster that is too small, then paying a second delivery fee when it fills in three days. A 10-yard container handles a bathroom remodel. A 20-yard container is the standard for a kitchen gut. A 30-yard container is typical for a whole-floor renovation. If you are unsure, ask your contractor what the demolition phase alone will produce, that number, not the total project, drives the first order.
Living With Debris on an Occupied Site
When you are living in the home during construction, debris management is not just about the dumpster. Dust, offcuts, and packaging migrate into living spaces within hours. Set a daily 15-minute sweep at the end of each workday, and keep a dedicated shop vacuum near the work zone boundary. Do not rely on your household vacuum, construction dust clogs filters and can void the warranty.
Scheduling Pickups Around Your Project Phases
Pickup timing should follow the project, not the calendar. Demolition week fills a container fast. Framing produces long offcuts that stack inefficiently. Finish work generates small volumes of packaging and trim. Match the container size and pickup frequency to the phase:
- Demolition: Full-size container, pickup within days
- Framing and rough-in: Medium container, weekly pickup
- Finishes: Small container or bagster, pickup every two weeks
Step 4: Homeowner Communication With General Contractors
Homeowner communication with general contractors works best on a fixed schedule, not on an as-needed basis. Set a weekly walkthrough and a daily text or email update. That rhythm catches small issues before they become change orders.
What to cover in each weekly check-in:
| Topic | What to Confirm | Frequency |
|---|---|---|
| Schedule | Tasks completed, next week's plan | Weekly |
| Budget | Any pending change orders | Weekly |
| Decisions | Selections still open | Weekly |
| Site access | Delivery times, work hours | As needed |
Step 5: Tool Storage, Inventory Tracking, and Site Security
Tool storage and inventory tracking protect your investment and keep crews productive. Theft on residential job sites is common, and a missing nail gun stalls work for a day.
Simple systems that work:
- A lockable job box bolted to the floor for power tools
- A shared inventory sheet updated at the end of each day
- Motion-sensor lighting on the storage area
- A gate that crews lock behind them
Step 6: Neighbor Relations, Noise, and Permit Requirements
Good neighbor relations prevent the complaints that can stall a project. This is the section most construction guides skip, because they are written for contractors who leave when the job is done. You still have to live next to these people. Treat neighbor communication as a project task with its own schedule, not an afterthought.
The Pre-Construction Neighbor Letter
Send a short letter or knock on doors at least one week before demolition starts. Include four things: the project scope in one sentence, the expected start and end dates, your contractor's name and phone number, and your own contact information. Neighbors who know who to call are far less likely to call the city.
Noise Mitigation That Actually Works
Noise is the most common friction point. Jackhammers, saws, and deliveries start early on many sites. Confirm local quiet hours with your permitting office and share those limits with your crew in writing, not just verbally.
Practical steps that reduce complaints:
- Ask crews to stage loud work, such as demolition and concrete cutting, for mid-morning rather than the earliest allowed hour
- Require radios to be kept at low volume or used with earbuds
- Have deliveries scheduled outside the early morning and evening hours when neighbors are home
- Warn adjacent households before the loudest phases, such as demolition or concrete pouring
Permits: What to Confirm Before Work Starts
Permit requirements vary by project and jurisdiction. Before work begins, confirm which permits your project needs and post them visibly on site. The U.S. Department of Housing and Urban Development's guidance on home improvements reminds homeowners that permits protect both property value and safety, so never let work start without them.
Ask your permitting office three specific questions:
- Does this project require a building permit, an electrical permit, a plumbing permit, or all three?
- Are there separate right-of-way permits for dumpsters, scaffolding, or equipment staging on the street?
- What are the posted work hours, and are there noise ordinances that restrict specific equipment?
Step 7: Post-Construction Site Restoration and Final Walkthrough
Post-construction site restoration brings your property back to a livable state. This phase covers grading, landscaping, and cleaning, and it deserves the same planning as the build itself.
Your restoration checklist:
- Remove all debris, dumpsters, and temporary fencing
- Grade and reseed disturbed lawn areas
- Repair any damaged driveway, fencing, or plantings
- Deep clean interior, including vents and ducts
- Final walkthrough with a punch list
Conclusion: When to Bring in a General Contractor
Managing construction site organization yourself is possible for small projects, but it gets overwhelming fast on a full remodel or custom build. Coordinating trades, permits, deliveries, and safety across months of work is a full-time job.
Frequently Asked Questions
How can I keep my home clean during a major construction project?
Set up a daily cleanup routine before work starts. Ask your contractor to seal off the work zone with plastic sheeting and zip walls, lay down floor protection along all traffic paths, and run a HEPA air scrubber in occupied areas. Keep a dedicated dumpster or bagster on site so debris never piles up indoors. Vacuum with a HEPA filter at the end of each workday rather than sweeping, which just spreads dust. A written site cleanliness clause in your contract makes this enforceable.
What are the responsibilities of a homeowner during construction?
Homeowners handle decisions, payments, and access, not labor. You approve change orders in writing, keep selections (tile, fixtures, paint) made before the schedule needs them, and provide clear site access during working hours. You also secure valuables, relocate pets, and communicate schedule changes to your household. For construction site organization, your biggest job is staying reachable and responding to questions within a day so crews are not idle waiting on answers.
How do I ensure my construction site remains safe for my family?
Treat the work zone as off-limits. Install temporary barriers or locked doors between occupied rooms and the construction area, and keep a residential construction site safety checklist posted for reference. Store tools, nails, and chemicals out of reach, and confirm the contractor has locked up power tools at the end of each day. Ask about fall protection, ladder placement, and open-hole covers. If you have young children, walk the site together with your contractor to flag hazards.
How do I communicate site organization expectations to my contractor?
Put it in writing before work begins. Ask for a site plan showing where materials stage, where the dumpster sits, which bathroom crews use, and what hours they work. Include a clause about daily cleanup and debris removal. Then set a recurring check-in, weekly at minimum, to review progress and flag issues early. Homeowner communication with general contractors works best when expectations are documented and reviewed on a schedule, not raised after a problem has already happened.