
 ultimate-guide
How to Ensure High Quality Craftsmanship: 2026 Guide
Table of Contents
- What High Quality Craftsmanship Actually Looks Like
- Signs of Quality Construction to Check Before You Sign
- How to Vet a General Contractor Before Hiring
- Construction Quality Control Checklist for Every Phase
- Red Flags of Poor Craftsmanship and How to Catch Them Early
- Maintenance and Longevity: Protecting Your Investment
- Frequently Asked Questions
Last Updated: September 11, 2026
What High Quality Craftsmanship Actually Looks Like
Quality craftsmanship is the measurable combination of correct material selection, precise execution, and finish work that holds up over decades of daily use. We define it by what you can't see: level framing, straight lines, sealed penetrations, and joints that stay tight after seasonal movement. Learning how to ensure high quality craftsmanship starts with knowing what to inspect, not just what to admire.
Most homeowners judge work by the surface. The real test happens behind the drywall and under the floor.
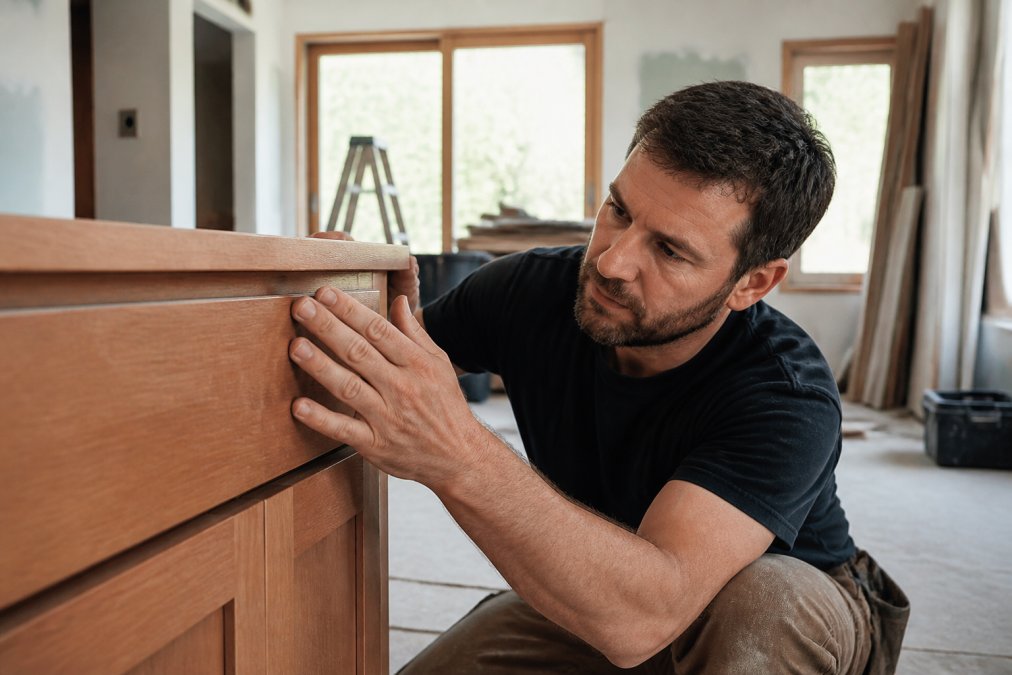
Material Selection and Sourcing
Material selection separates work that lasts from work that looks good for two years. Solid wood, stone, and quality tile behave predictably; bargain composites often don't.
Ask where materials come from and who specified them. A common mistake is letting the lowest bid drive sourcing without checking grade, moisture content, or manufacturer warranties. Sustainable materials and premium products cost more up front but reduce callbacks.
Precision, Finish Work, and Attention to Detail
Precision shows up in the details nobody photographs: consistent grout lines, doors that close with one finger, trim miters that meet without filler.
In practice, this means checking three things before you sign off on any room:
- Cabinet doors align flush across the full run
- Flooring transitions sit level with no lippage
- Paint and caulk lines run straight at every corner
Signs of Quality Construction to Check Before You Sign
The signs of quality construction are structural, mechanical, and cosmetic, in that order. Inspect the bones before you judge the finish, and bring three tools: a 4-foot level, a flashlight, and a roll of painter's tape to flag anything questionable for the punch list.
What separates a real inspection from a walkthrough is tolerances. Acceptable field tolerances often cluster around a few measurable thresholds you can check yourself:
- Walls and framing: A 4-foot level placed vertically on a stud wall should show no more than about 1/4 inch of gap across its length (hud.gov). Anything more suggests a bowed or out-of-plumb wall that will telegraph through drywall and tile.
- Floors: A 6-foot straightedge laid across a finished floor should not reveal a gap greater than roughly 1/8 inch over that span. Larger dips mean underlayment or subfloor problems that will crack tile and squeak underfoot.
- Door and cabinet reveals: Gaps between a door slab and its frame should be uniform top to bottom and side to side, typically within 1/8 inch (wdma.com). A door that closes with one finger but shows a widening gap at the top hinge is a hinge-set problem, not a charm.
- Tile and grout lines: Joints should be consistent in width across the field. Grout lines that wander by more than about 1/16 inch signal a layout that was eyeballed rather than snapped.
- Trim miters: Inside and outside corners should meet with no visible filler. Caulk smeared into a gap wider than a credit card is hiding a bad cut, not sealing a small seam.
Behind-the-Walls Quality: Framing, Plumbing, and Wiring
Framing, plumbing, and wiring determine whether a house performs for fifty years or fails in five. Level framing and correct structural integrity matter more than any paint color.
What most guides miss is timing. Once drywall goes up, you lose the ability to verify most of this. Photograph the open walls before they're closed. Confirm pipe supports, wire stapling, and blocking for future fixtures.
A pre-drywall walkthrough is the last cheap moment to catch hidden defects. Bring this list and check each item while the studs are still exposed:
- Framing: Headers over openings sized per the approved plans; king and jack studs present at each opening; walls plumb within the 1/4-inch tolerance noted above.
- Blocking: Solid blocking installed behind every planned grab bar, TV mount, cabinet, and towel bar location. Missing blocking means hollow-wall anchors later.
- Plumbing: Supply lines pressure-tested and holding; drain lines sloped toward the stack; pipe supports spaced so lines don't sag or hammer.
- Wiring: Cables stapled at required intervals, notched or protected where they pass through studs, and labeled at the panel. Junction boxes should be accessible, never buried.
- Penetrations: Every hole through top plates, sole plates, and exterior sheathing sealed against air and moisture intrusion.
Take dated photos of every open wall, then store them with your closing documents. When you sell, those photos are proof of what's behind the drywall, and they end arguments about whether a defect was pre-existing.
How to Vet a General Contractor Before Hiring
Vetting a general contractor comes down to verification, not conversation. Check licensing, insurance, and completed projects you can actually visit.
Many homeowners find that the best signal is how a contractor answers hard questions. Vague answers about project management and scheduling are a warning sign.
Questions That Reveal a Contractor's Real Skill Level
Ask questions that require specific answers, not reassurances:
- Who is my single point of contact from start to finish?
- How do you handle changes once construction begins?
- Can I visit a current job site?
- Who supervises the subcontractors daily?
- What happens if work fails inspection?
According to the U.S. Environmental Protection Agency's lead-safe renovation guidance, renovation firms working on pre-1978 housing must follow specific certification and containment practices. Ask any contractor how they comply before work starts.
Construction Quality Control Checklist for Every Phase
A construction quality control checklist turns vague promises into pass-or-fail items you can verify at each stage.
Use this phase-by-phase checklist and sign off only when every line passes:
- Pre-construction: permits posted, scope and schedule in writing
- Foundation: forms square, reinforcement placed per plan, drainage graded away
- Framing: walls plumb, headers sized correctly, blocking installed
- Rough-in: plumbing pressure-tested, wiring stapled and labeled
- Insulation: full coverage, no gaps around penetrations
- Drywall: seams staggered, corners reinforced
- Finish: trim tight, paint uniform, hardware aligned
- Final: systems tested, punch list closed, warranties delivered
| Phase | What to Verify | Why It Matters |
|---|---|---|
| Pre-construction | Permits, written scope | Prevents disputes later |
| Framing | Plumb walls, correct headers | Structural integrity |
| Rough-in | Pressure tests, labeled wiring | Hidden failure prevention |
| Finish | Aligned trim, uniform paint | Long-term appearance |
| Final | Systems tested, punch list closed | Confirms reliability |
Red Flags of Poor Craftsmanship and How to Catch Them Early
Poor craftsmanship usually announces itself before the final walkthrough. Catching the warning signs early saves thousands in rework. What many guides skip is the specific visual tells and the timing at which each one becomes visible.
Use this tell-by-tell guide, organized by when you're most likely to spot it:
During framing (before drywall):
- Studs with large knots, splits, or bowing installed in load-bearing walls instead of being culled.
- Notches and holes cut through the middle third of a joist or the tension edge of a header, a structural compromise that's invisible once covered.
- Missing or undersized headers over wide openings, or headers supported by a single jack stud where the plans call for two.
- Blocking omitted behind tub surrounds, shower valves, and toilet flanges.
During rough-in:
- Plumbing supply lines that flex or sag between supports, or drain lines that run flat or uphill toward the stack.
- Electrical cables run diagonally across stud bays instead of horizontally or vertically, which makes future drilling dangerous.
- Junction boxes buried behind drywall or set too far back from the finished surface.
During finish work:
- Caulk used to hide misaligned joints instead of closing small seams. A bead wider than a pencil is a cover-up, not a seal.
- Inconsistent gaps between trim, tile, or cabinet doors, the eye reads variation as error even when each individual gap is small.
- Paint sprayed over hardware, outlets, or hinges rather than masked. Overspray on a hinge is a tell that the prep work was rushed.
- Subfloor squeaks that appear within days of installation, usually from missing adhesive or under-driven fasteners.
- Grout that changes color across a floor, indicating inconsistent mixing or too much water in the batch.
Behavioral red flags:
- Subcontractors who can't explain what they're installing or why.
- No written change orders, verbal agreements are how scope disputes start.
- Pushback when you request an inspection or ask to see the permit.
- A schedule that never slips, because it was never real.
Reputable builders welcome scrutiny. If a contractor resists your checklist, that resistance is your answer. The cheapest time to catch a defect is the day it's created; the most expensive is after the punch list is signed.
Maintenance and Longevity: Protecting Your Investment
Long-term value depends on maintenance as much as initial workmanship. Even excellent construction degrades without care.
A practical routine keeps structures performing:
- Inspect caulk and sealant annually, reseal as needed
- Check grading and drainage each spring
- Re-torque hardware and adjust doors seasonally
- Schedule professional inspections every few years
Reliability comes from consistent upkeep, not one-time fixes. Quality assurance continues after the crew leaves.
Ensuring high quality craftsmanship is a process of verification at every phase, not a promise made at signing. Master Builder llc. delivers an end-to-end client experience, manages occupied and fully operational job sites with minimal disruption, and collaborates directly with architects and designers so nothing falls through the cracks. Our comprehensive planning and staffing keep quality measurable from foundation to final walkthrough. Get started with Master Builder llc. and build structures that hold their value for decades.
Frequently Asked Questions
What are the key indicators of high quality craftsmanship in construction?
Look for tight joints with no gaps, level framing, smooth finish work, and doors or cabinets that close flush without sticking. Check that materials match the spec sheet and that plumbing and wiring behind the walls are properly secured. A contractor who walks you through these details and welcomes inspections is usually delivering quality craftsmanship, not hiding problems.
How do I vet a general contractor's commitment to quality before hiring?
Ask for references from projects finished at least two years ago, then visit them. Request their construction quality control checklist and ask who performs inspections at each phase. Verify their license, insurance, and whether they use licensed trades for plumbing and electrical. A contractor who hesitates to share these details or rushes you past them is a risk.
What are common signs of poor craftsmanship to watch for during a build?
Uneven tile lines, gaps around trim, doors that stick, and cabinets that are not level are visible red flags. Behind the walls, look for unsecured wiring, poorly sealed plumbing penetrations, and framing that is out of square. If a contractor dismisses these as normal or promises to fix them later, that pattern usually repeats through the rest of the project.
How can homeowners monitor quality control during a build?
Schedule walkthroughs at the end of each major phase: framing, rough-in, insulation, drywall, and finish. Bring the construction quality control checklist and take photos. Ask questions about anything that looks off, and get answers in writing. A reliable contractor will welcome this, because catching issues early costs far less than fixing them after the drywall goes up.
Does material selection really affect the final quality of a renovation?
Yes. Solid wood, quality tile, and properly rated fixtures hold up better and look better over time than cheaper substitutes. Material sourcing also matters: lumber that has not been dried properly will warp after installation. Ask your contractor how they source materials and whether substitutions require your approval before they are installed.
How do I know if a contractor's higher price is justified?
Ask for a line-item breakdown showing labor, materials, and allowances. Compare the scope, not just the total. A higher quote often reflects better materials, licensed trades, and more thorough project management. If a contractor cannot explain what drives their price or refuses to put the scope in writing, the difference is not quality.